Scanning Stuff
-- -- -- -- -- -- -- -- -- --
-- -- -- -- -- --
The Atomic Guide to Basic
Gimp Stuff
Here's an example of getting a raw
scan into a decent image. The original was done over lunch on
the back of the restaurant's place mat. The front side had
advertising which bled through the thin paper during the scan.
Ick!
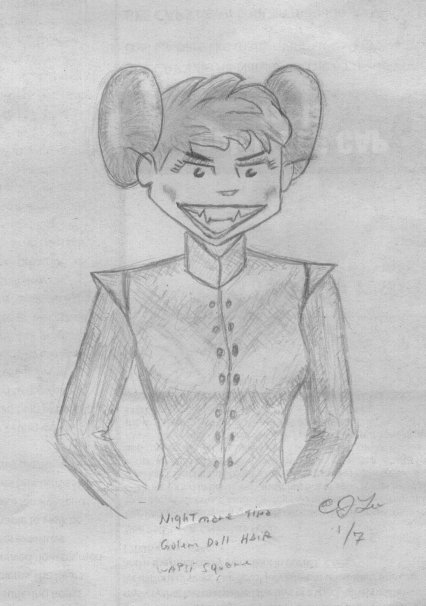 Yep -- it's not very nice to
look at. (Click
image to see full size)
Yep -- it's not very nice to
look at. (Click
image to see full size)Well, first things first:
1. Scan at 200dpi or more to get as much detail as possible. More pixels mean better results later.
2. Even if your scanner package supports it, avoid tweaking the contrast, gamma, and other settings. Let GIMP do the work on copy working layers. Keep the original as original as possible.
3. Try to get it as square a possible the first time. GIMP supports rotation, but even small rotations can play havoc with the details -- especially straight lines. Your mileage may vary.
4. If you can't get GIMP to use you scanner by the File, Acquire, TWAIN menu, then try for a TIF output from your scanner. TIF files are not compressed or smoothed, so you don't lose anything between scanner and GIMP.
5. As always, save the image in GIMP with the .XCF work file extension. Set Image, Mode to RGB for best flexibility with the work to come.
Adjusting Contrast
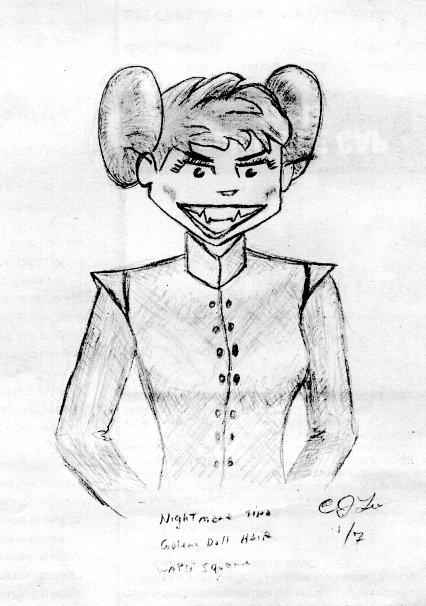 At this point, you should
have copied the original onto it's own layer, added a white background
layer, and saved your work. Good!
At this point, you should
have copied the original onto it's own layer, added a white background
layer, and saved your work. Good!Now copy the original onto another layer for adjustment. Turn original layer visibility off.
The Tools, Color Tools menu has plenty of things to play with.
The Threshold tool is best for pure black/white drawings. It will let you set your breakpoint between black and white with no in between. It's not so good for this image because I want the grays, but play with it to see what happens.
The Levels tool lets you adjust contrast at the high and low ends using sliders or automatically if you choose. Just click the Auto button!
Alas, it didn't do too well with this image due to all the background bleed through.
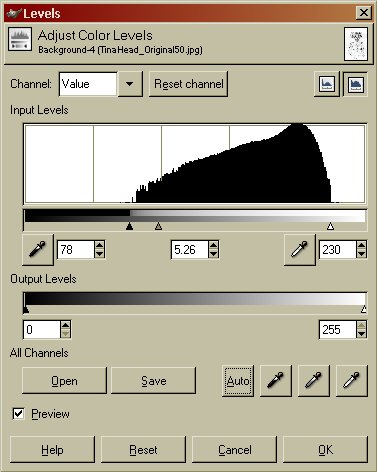 Note the three eyedroppers next to the Auto button. From left
to right, they let you pick a Black, Mid-tone, and White spot on the
image, and then it will use those spots to set the levels.
 Or, you can use the sliders under the Input Levels histogram -- again, Black, Mid-tone, and White marked by the little triangles.
As seen in the histogram, most of the image is middle gray tending toward white. I set the sliders to the ends of this area, then moved the mid-tone slider to the left to darken up the lines. The result is the image above!
Not too bad so far. At least the lines are distinct, which is more important than the bleed through areas.
Cleanup
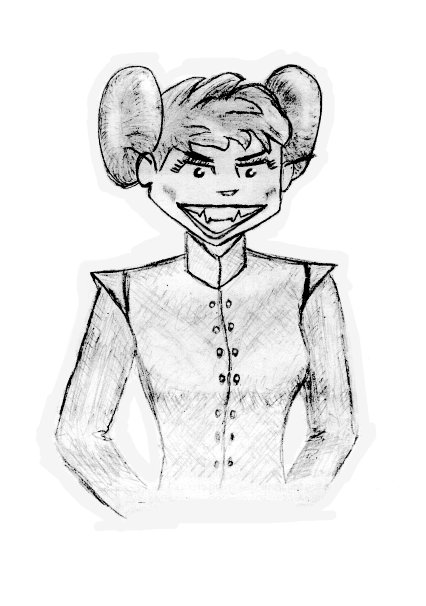 I simply cut out all the
garbage background.
 This was also the opportunity to tidy up some nasty lines with blur, smudge or other tools. I also tweaked the eyes to enhance the shine.
Last was dealing with the halo around the drawing. Simple answer - fill the background with that shade!
Final Stuff
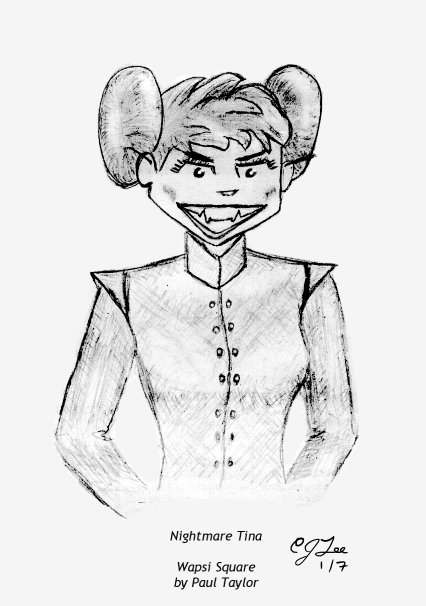 Add the title info and credits where credit is due -- to Paul Taylor, of course, for the inspiration.
At this point, you have a finished image that's very large. The original and subsequent working image files were based at 200 dpi and 852 pixels wide x 1212 px high.
Time to shrink it for web use. Leave the original XCF file alone -- use Save Image As and select .jpg to make an image file. Note that GIMP will continue to display the various layers. Ignore this.
Note: use GIF if you want to have transparent parts of your image.
Once saved as a JPG, then use the Image, Scale Image menu to first scale the image 50%, making it 426 x 606 px. Save again over your file.
Finally, Scale Image again, and drop the X- and Y- resolution from 200 dpi to 72 dpi. This makes it web display standard resolution.
You're done!
Now What?
Don't just sit there -- go make some artsy
things! Have fun! Remember, most web drawings are shrunk 30
- 50% or more, so draw big to begin with. Just keep in mind that
shrinking the image won't make bad work look that much better, just
smaller.
And keep looking and learning by reading other stuff, like here:
And keep looking and learning by reading other stuff, like here:
More Stuff -->
Links to Other Guides